Hello Crafty friends,
Sylvie @kaliscards here.
Sharing another Creative Stamping Magazine project today.
I cut a panel of white cardstock, slightly bigger than the Charming Flora Cover die and blended Distress oxides Salvaged Patina, Peacock Feathers and Mermaid Lagoon, going darker at the top and fading it out towards the bottom. I also inked another smaller panel that I will use for the sentiment.
I then die cut the panel with the Charming Flora Cover die.
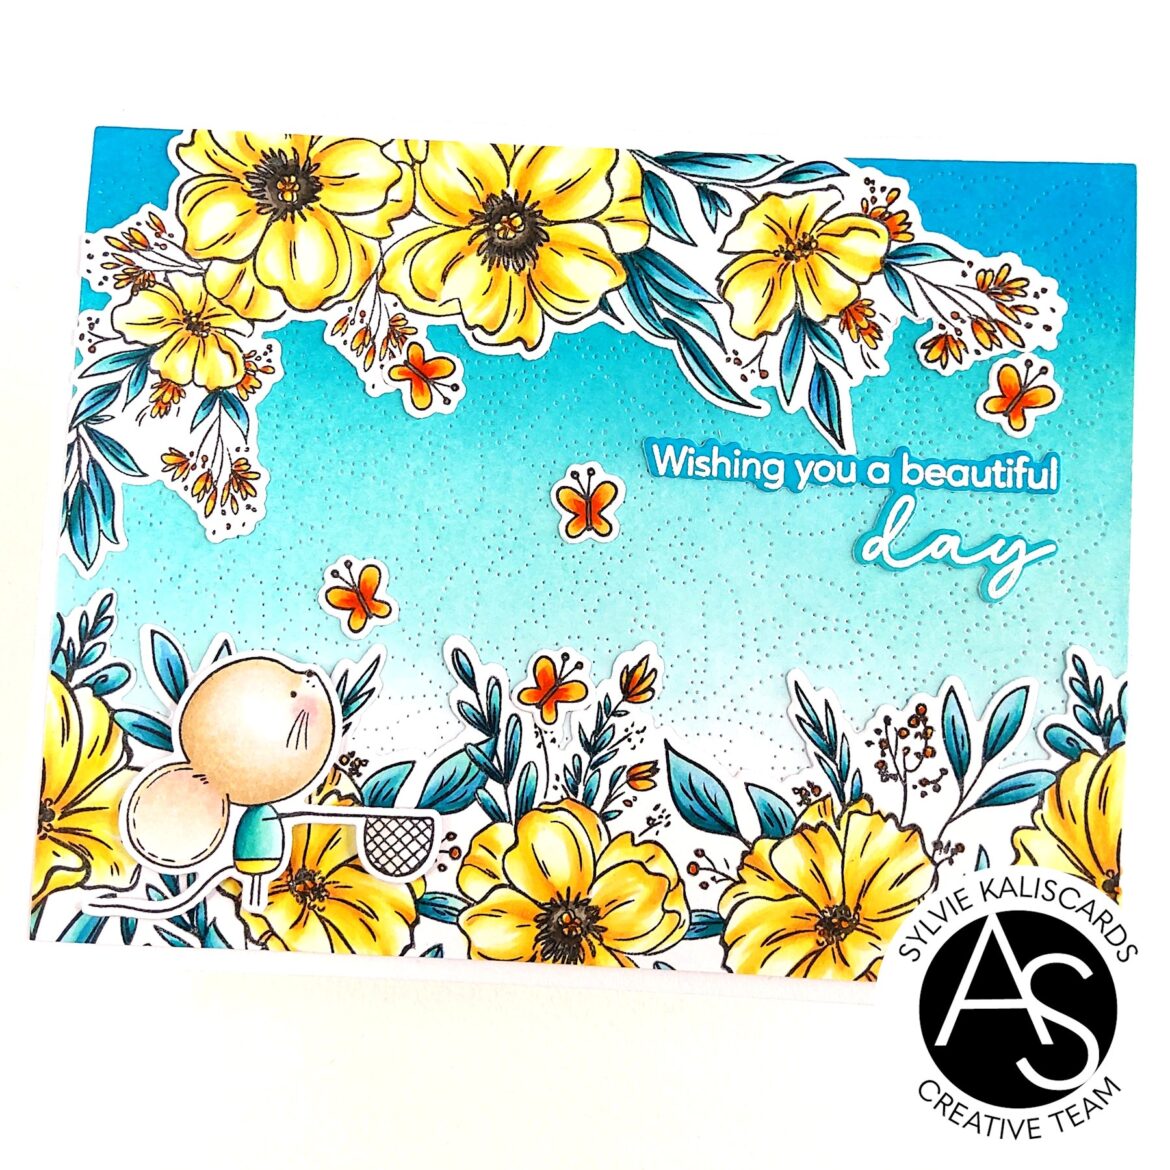
Next, I stamped the cute mouse from the Sweet Friend set, the two floral borders from the Bouquet of Blessings and 5 butterflies from the Cheerful Panda Moments set on white cardstock, with black ink. I colored the images with Copic markers: E42 E41, E40 and W00 for the mouse. I colored the cheeks and ears with RV11, R00 and R000. With a Soufflé black glaze pen, I added details on the eyes and muzzle. I added a shadow inside the net with markers W1 and W00. For the clothes, I used YR21, Y13, Y11, BG49, BG23 and G00; I colored the butterflies in oranges YR07, YR02, YR24, YR21 and used W6 for the body and antennas. I colored the bouquet with yellows and oranges for the flowers: E33, YR21, Y21, Y11 and Y000. For the flower centers, I used W9, W7 and W5, and for the leaves, BG49, BG23, G00, B24 and B21.
On the small inked panel, I stamped the sentiment from the Beautiful Day stamp set with Versamark ink and heat set it with WOW white embossing powder.

I then used the coordinating dies to die cut all the images and sentiment (Sweet Friend, Cheerful Panda Moments, Bouquet of Blessings and Beautiful Day).
To assemble the card, I adhered the background panel on my cardbase with liquid adhesive.
I then trimmed the bottom flowers to match the mouse height and top flowers to a straight border, and glued them on the background. I also glued the sentiment and butterflies and adhered the mouse with foam tape.

Thanks for stopping by.
Have a wonderful day!
Sylvie

